![]() Tasks Menu
Tasks Menu
Tasks can be assigned to a user in connection to a Note that has been added to a case. Like Alerts, a Task can also be created that isn’t associated with a case. To access Tasks, select the ![]() Tasks button from the
Tasks button from the ![]() Home Screen.
Home Screen.
All of your Tasks will be displayed on this screen, sorted by Client Name. Tasks that have been created from a Case Note (see the ![]() Notes section for details) will include a blue hyperlink which can be used to access the case directly. Each Task may be edited by clicking the
Notes section for details) will include a blue hyperlink which can be used to access the case directly. Each Task may be edited by clicking the ![]() Edit icon which is displayed next to each note.
Edit icon which is displayed next to each note.
To clear a Task, select the corresponding checkbox and then click the ![]() Clear button. All Tasks can be selected at once by selecting the checkbox found in the column header.
Clear button. All Tasks can be selected at once by selecting the checkbox found in the column header.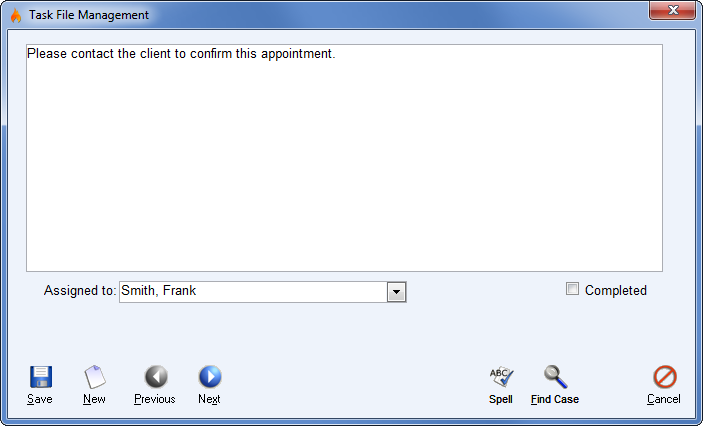 Enlarge pictureThe
 ![]() New button is used to create a new Task as shown to the left.
New button is used to create a new Task as shown to the left.
A Task may be assigned to one user by selecting the name from the Assigned to picklist. A Task can be cleared by selecting the Completed checkbox and then clicking the ![]() Save button.
Save button.
The ![]() Previous and
Previous and ![]() Next buttons are used to navigate from one Task to the next.
Next buttons are used to navigate from one Task to the next.
See also
