Home > Case Management > Documents > Primary Toolbar
![]() Primary Toolbar
Primary Toolbar
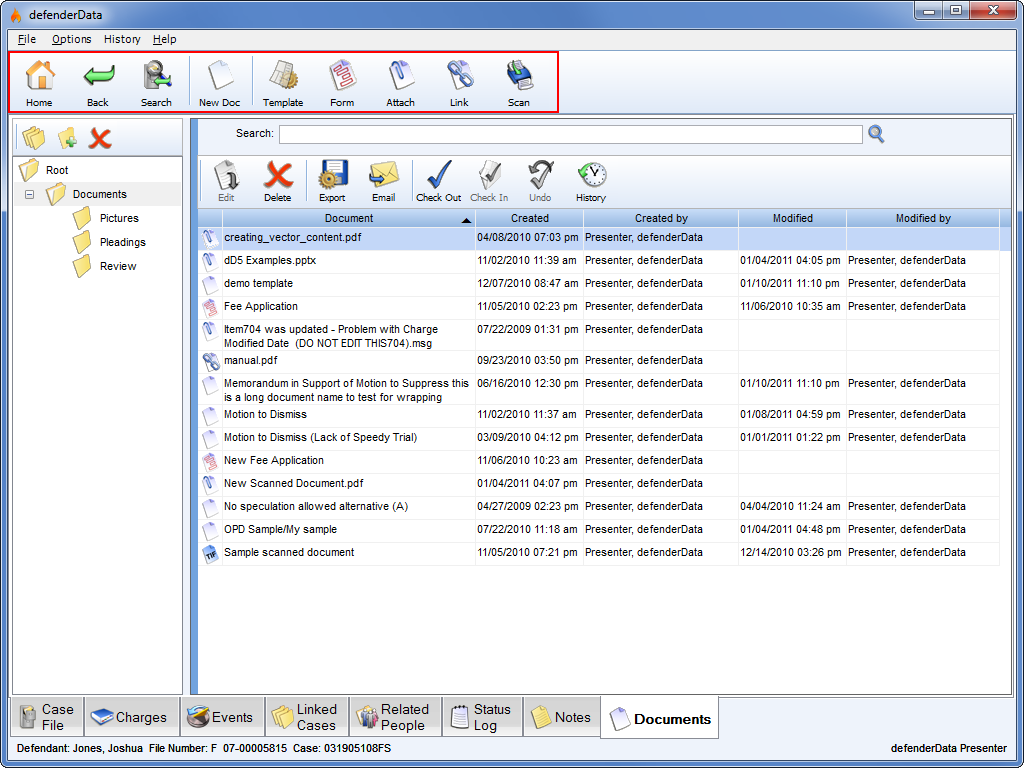
The primary toolbar on the ![]() Documents tab includes many useful functions as described below.
Documents tab includes many useful functions as described below.
Toolbar Button Descriptions![]() Home
Home
Use this button to return to the ![]() Home Screen.
Home Screen.
![]() Back
Back
Select this option to navigate back to the previously viewed case tab.![]() Search
Search
This function is used to navigate back to the previously used ![]() Search Menu to find another case. Any results that were found by the previous search will still be displayed so that another match can be easily selected.
Search Menu to find another case. Any results that were found by the previous search will still be displayed so that another match can be easily selected.![]() New Doc
New Doc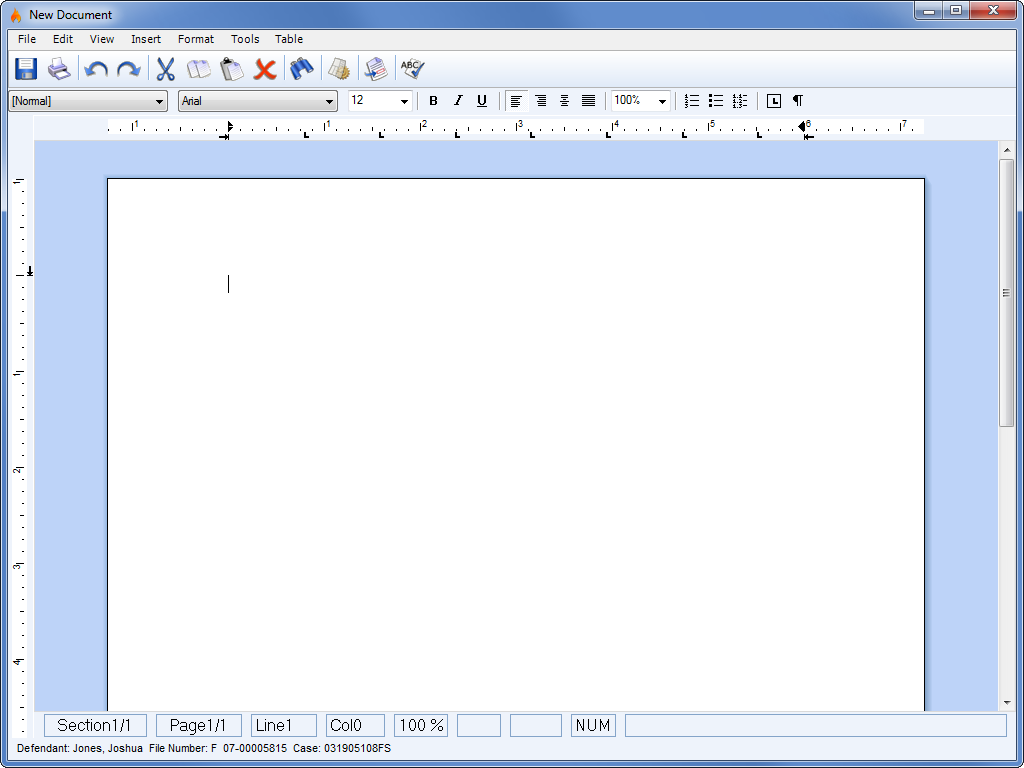 Enlarge pictureThis button is used to create a new document in the selected folder. When selecting this option a blank new document is created and opened in a new window as shown to the right.
One the new document is saved you'll be prompted to provide a Document Name. Any documents created in this defenderData native format can be edited directly within the application by anyone with edit access to the client's case file. These documents can also be exported to common file formats such as Adobe PDF, MS Word or Rich Text.![]() Template
Template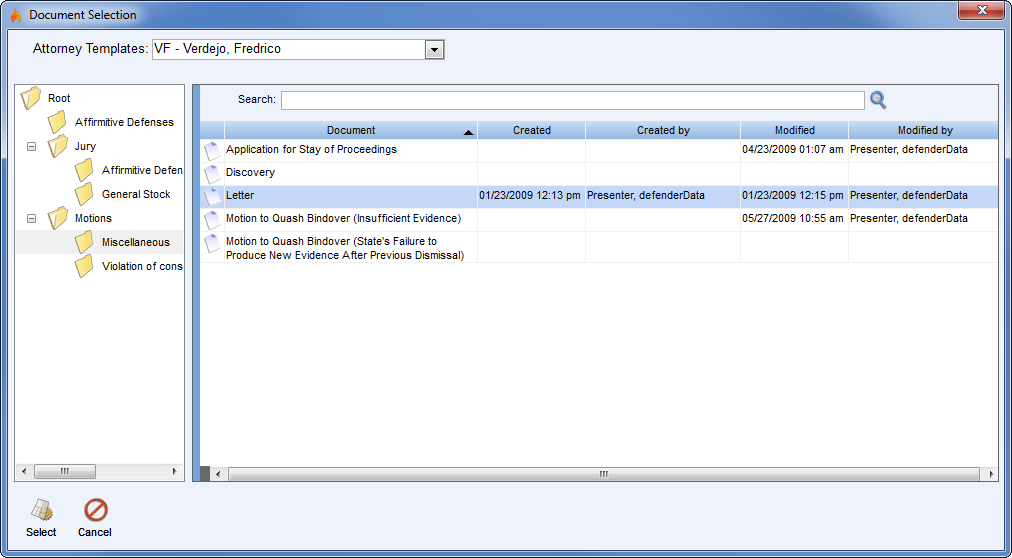 Enlarge picture
Used to create a new document based on an existing Template. When selecting this option the Document Selection window will is displayed for selecting the template to generate.
Next, select an attorney from the Defender Templates field to see a list of available templates. Once the correct template has been found, double-click the file or highlight it and click the ![]() Select button.
Select button. ![]() Note: Automatically generated documents will be stored within an “Auto Docs” folder.
Note: Automatically generated documents will be stored within an “Auto Docs” folder.
![]() Form
Form
Forms are are designed to restrict which areas of the document users can edit, similar to a fillable PDF.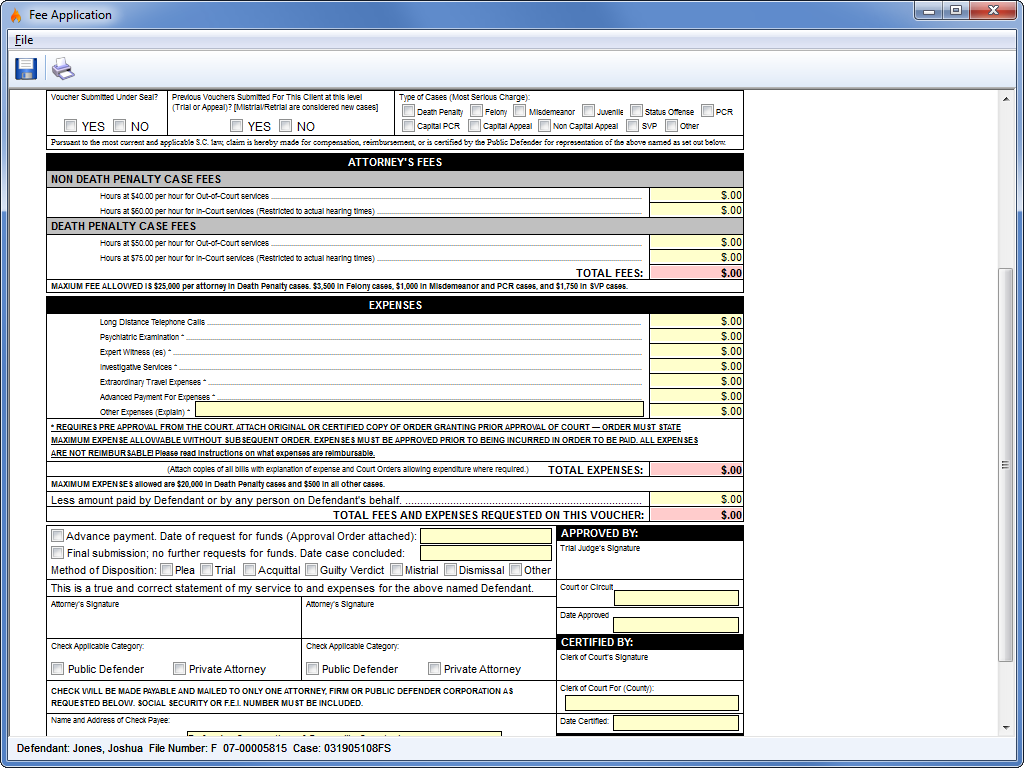 Enlarge picture In the example form shown to the left all fields highlighted red indicate values that are either automatically merged from the case file or automatically calculated. Fields highlighted yellow are the only areas of the document that can be edited by the user.
![]() Note: Forms cannot be created or modified within the defenderData client software interface. They must be created and maintained by the defenderData Support team.
Note: Forms cannot be created or modified within the defenderData client software interface. They must be created and maintained by the defenderData Support team.![]() Attach
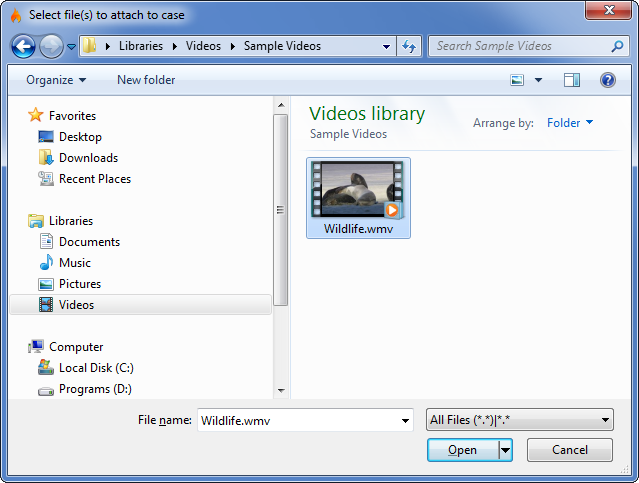
Attach
To upload a file from your computer, first select the folder where the file will be saved and then click the Attach button. A file selection window will be opened as shown below. Browse to the location of the file to select it and then click Open to attach it to your case.
![]() Link
Link
This function is used to create a link to a document that's stored on your local network. When a file is Linked it won't actually be attached to the case, instead the Link simply acts as a shortcut to thefile allowing you to easily open, view and edit the file.
![]() Scan
Scan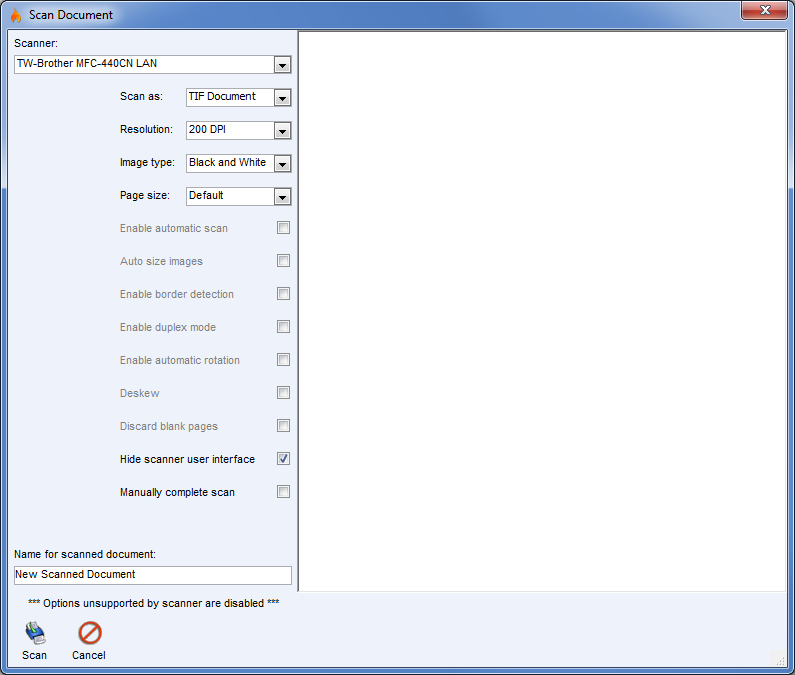 Enlarge picture
The Scan button is used to new document in the selected folder. To scan a new document, select the scanner connected to your computer from the Scanner field and then click the Scan button.
New documents can be scanned in either TIF or PDF format and all preferred scan settings will be remembered for future scans.
See also