Home > Case Management > Case File
![]() Case File
Case File
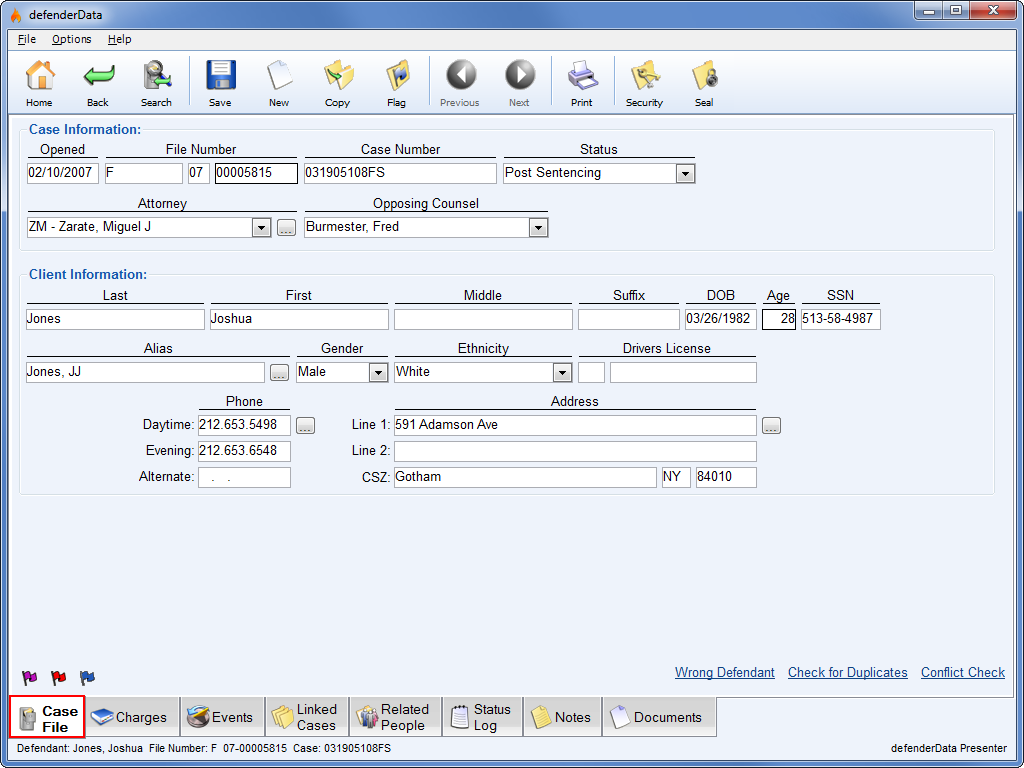
This is the default tab which includes the primary Case Information and Client information.
The various tabs shown along the bottom of the screen are used to navigate throughout the case to view all case related details.
While navigating through each case tab, the status bar at the bottom of the application window will continue to display the client name and File Number.
 Note: When creating a new case, the File Number must be specified before the new case can be saved.
The following links are shown in the lower right hand corner of the Case File tab:
Note: When multiple cases are merged together all Phone details are stored in the Phone Change Log, all Address details are stored in the Address Change Log and all Aliases are stored. The selected Phone, Address and Alias fields will become the primary contact information shown for the merged record.When you're ready to complete the merge, select the Preview Merge button and a preview of the records to be merged will be displayed as shown to the right.
The new client record is shown previewed along with the total number of cases for each client record included in the merge.
Select the Case Involvement tab to view additional details about each case as shown below.
Toolbar Button Descriptions![]() Home
Home
Use this button to cancel any edits and return to the Home Menu. If any changes have been made, you will be prompted to confirm that the changes will be cancelled as shown below.
![]() Copy
Copy
This function is used to copy information from the case currently being viewed. There are two options available in this window. Copy to:
| 1. |
New Case - This option is used to copy the selected details into a new case. Once selected, various information may be included or excluded using the corresponding checkboxes as shown below. |
2. |
Existing Case - This option is used to copy details over to a case that already exists in the system. The "Copy Case" and "Copy Defendant" options aren't shown since they aren't applicable for this option. |
 Enlarge picture Enlarge picture |
 Enlarge picture Enlarge picture | ||
|
Once selections have been made for either of the above options and you're ready to continue, select the For the Existing Case option a search screen will be displayed as shown to the right so that you can find and select a destination case. | |||
![]() Flag
Flag Enlarge pictureThis function is used to add or remove Case Flags to the case. As shown to the right, Flags are shown on the lower left-hand corner of the
 ![]() Case File tab.
Case File tab.
Case Flags can also be used as search parameters or report parameters when statistics are needed.
![]() Previous
Previous
Navigate to the previous case found in the ![]() Search Menu.
Search Menu. ![]() Next
Next
Navigate to the next case found in the ![]() Search Menu.
Search Menu.
![]() Print
Print Enlarge picture
Opens the Print Selection window to print various case-related details as shown to the right. Once an option is selected, click ![]() Ok to view a Print Preview.
Ok to view a Print Preview.
![]() Security (Admin only)
Security (Admin only) Enlarge picture
This function is used to override the the View and Edit rights to the case as shown to the left. Inherited Rights are the permissions inherited by each user based on their current account permissions. Exceptions can be set for the case currently being viewed by modifying the View & Edit rights under the Case Rights column.
In the example shown above, Joe Brown does not have access to the case base on his account permissions but he was given View only access and Frank Smith's access to the case was removed.
![]() Seal (Admin only)
Seal (Admin only)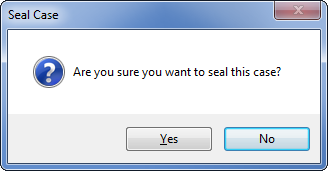 Enlarge picture
Once selected, the Seal Case dialog will be displayed as shown to the right. Once a case has been Sealed, it will be hidden from view for users that do not have Admin rights. The case may only be un-sealed by an administrator. When the case is opened by an administrator, the Case Sealed dialog will be displayed as shown below.
See also